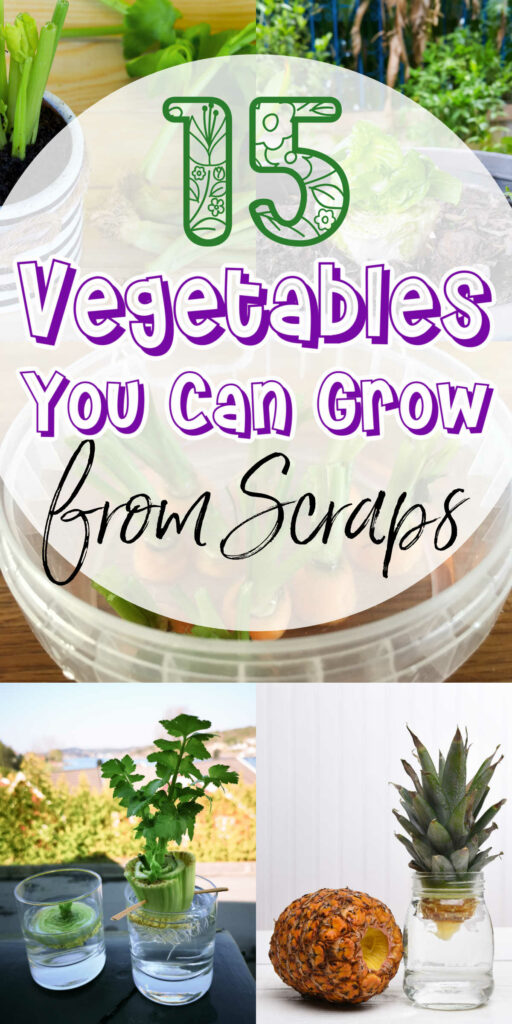
Learn which vegetables you can regrow from scraps as well as how to regrow them!
Have you ever wondered what to do with your vegetable scraps?
Believe it or not, many common vegetables can actually be regrown from kitchen leftovers.
This eco-friendly practice is not only an easy way to recycle food waste but also a cost-effective solution for cultivating fresh, healthy produce right in your own home.
Plus, it’s fun and a great activity to do with kids. There’s nothing quite like growing your own food.
You’ll find produce is fairly easy to regrow and many different items are regrown the same way.
Table of Contents
Benefits of Regrowing Vegetables
Regrowing vegetables from scraps offers several advantages for both the environment and the gardener. It promotes sustainability, reduces waste, and encourages a connection with nature, while also providing a fun and engaging way to grow your own food.
Regrowing vegetables is also an excellent way to save money on groceries.
With certain vegetables like celery being easy to regrow, you can potentially save money by avoiding the need to repurchase these items as frequently.
Additionally, growing your own vegetables can lead to fresher, more nutritious produce compared to the store-bought alternatives.
Regrowing vegetables can be a fun, hands-on way to teach children about nature. It’s a practical skill that can be useful to use throughout one’s life.
Gardening activities are known to reduce stress and promote relaxation.
Tending to your plants, observing their growth, and witnessing new life from scraps provides a sense of accomplishment and mindfulness that can be therapeutic for many people.
Preparing Your Scraps for Regrowth
Before you start regrowing your vegetable scraps, it’s important to prepare them properly to ensure a successful regrowth process.
Here are some general tips on how to prepare common vegetables for regrowth:
- Potatoes and Sweet Potatoes: Cut the potato into two pieces, making sure each half has at least one to two eyes. Allow the pieces to sit at room temperature overnight, or for a few days until they’re dry to the touch. Then, plant the potato halves about one foot apart in 8 inches of soil.
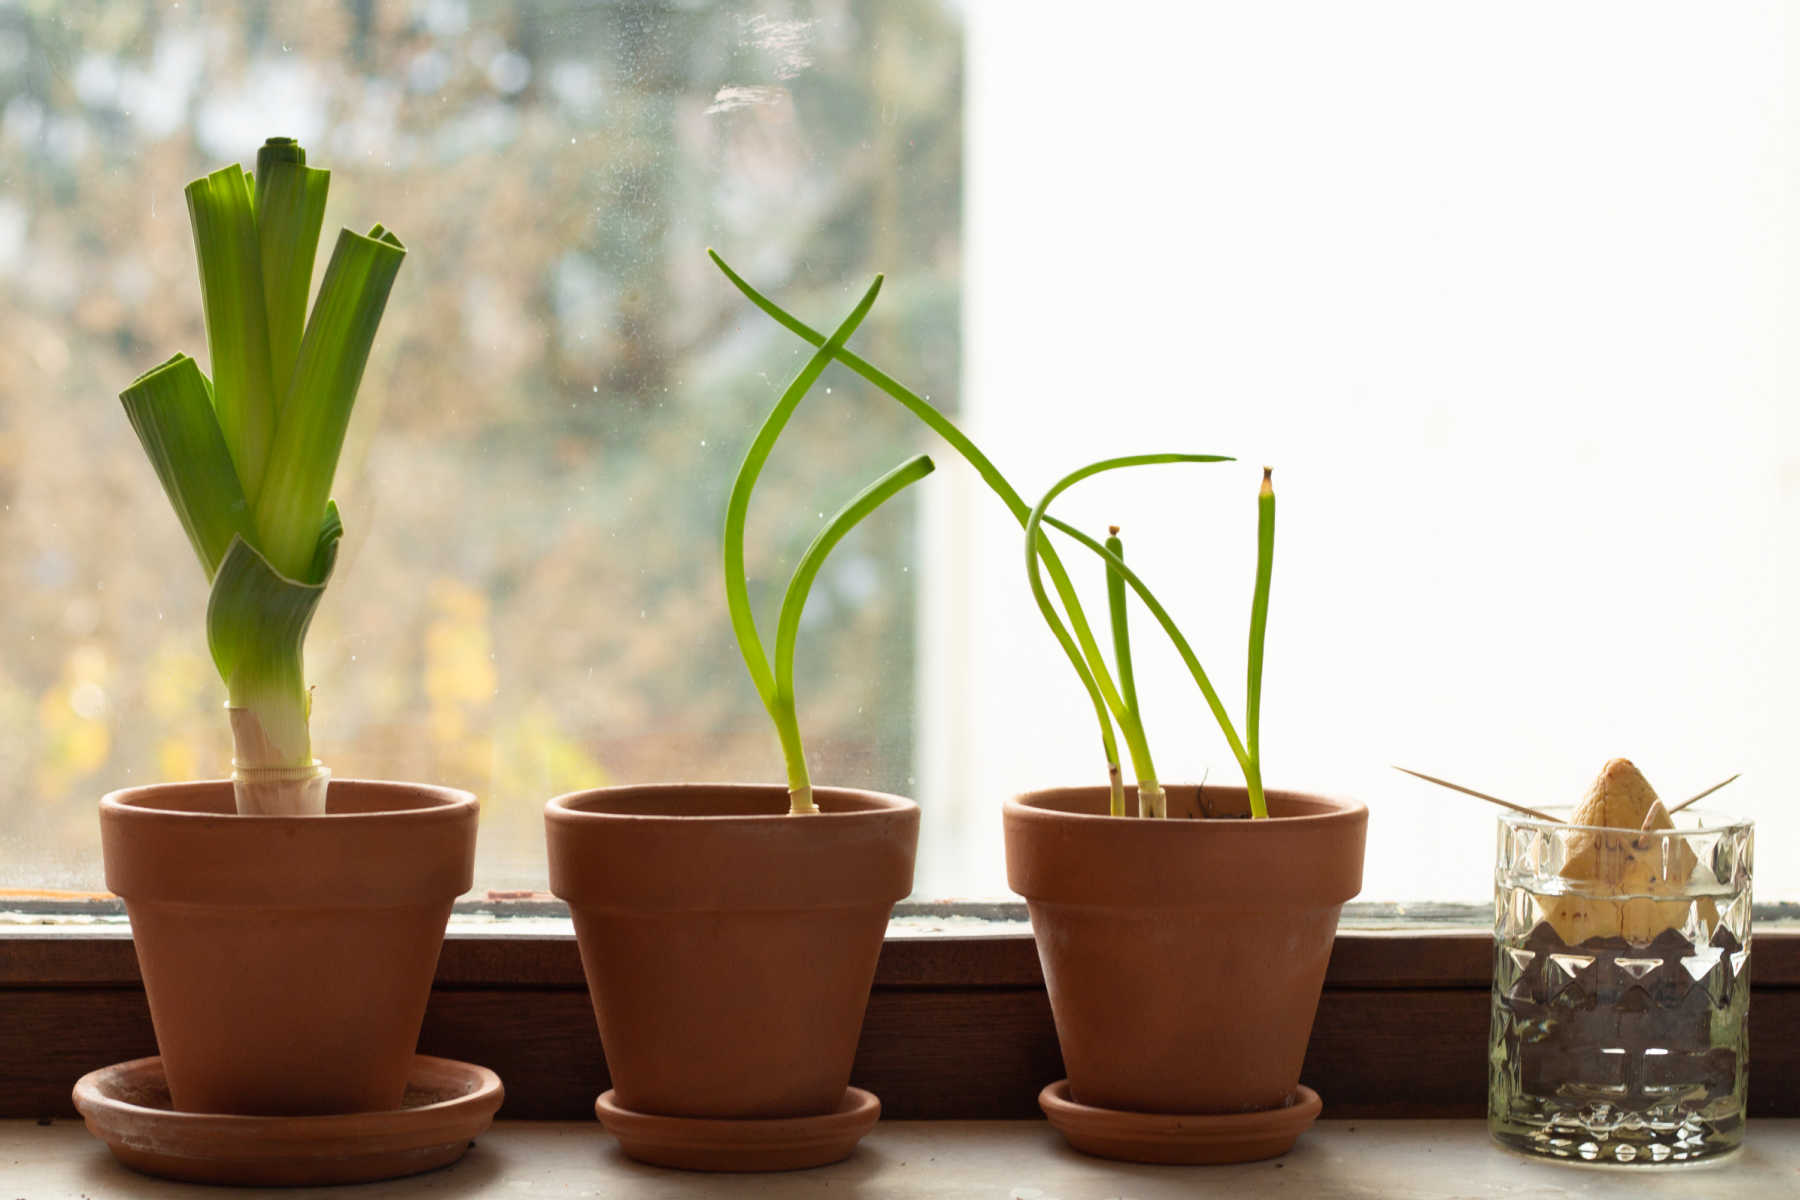
- Onions, Garlic, Leeks, and Shallots: Use the end with the little roots growing out of it. Plant the root end down in some quality potting soil, place it in a sunny window, and keep it watered.
- Celery and Bulb Fennel: Place the bottom part of the celery or fennel in a shallow bowl with a little bit of water. Set it near direct sunlight, and after a few days, you’ll see new growth.
- Carrots, Turnips, Parsnips, Beets, and Other Root Crops: Cut off the top part of the root vegetables and place it in a shallow dish with water. Make sure the water is covering the bottom half of the piece. Place the dish in a well-lit area and wait for new greens to sprout.
- Leafy Greens and Herbs: For lettuce, bok choi, cabbage, basil, mint, cilantro, and other leafy greens and herbs, place the base of the plant in a shallow bowl with a little water. Set it near direct sunlight and, after a few days, you’ll observe new growth.
Preparing your vegetable scraps for regrowth is a simple process that only requires a few basic steps. By following these guidelines, you’ll be on your way to enjoying fresh, homegrown vegetables in no time.
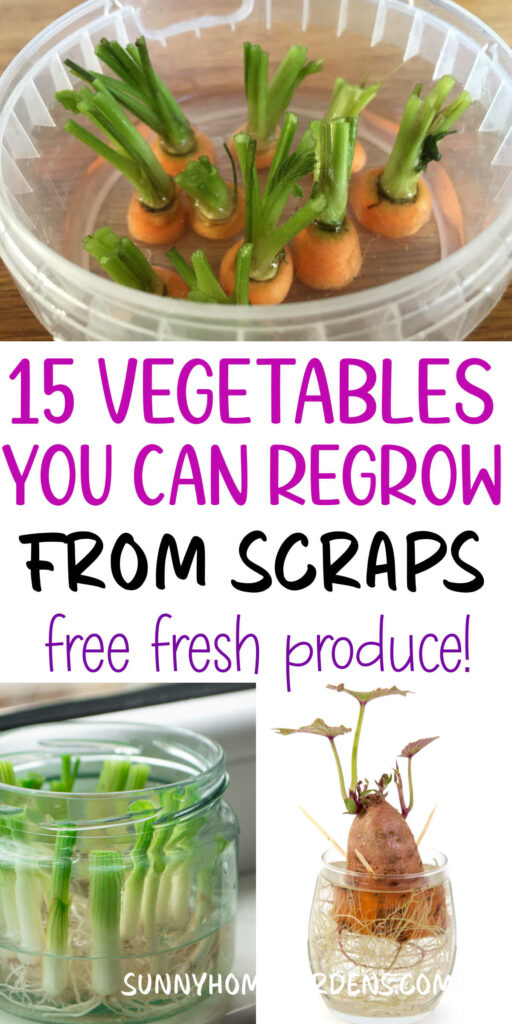
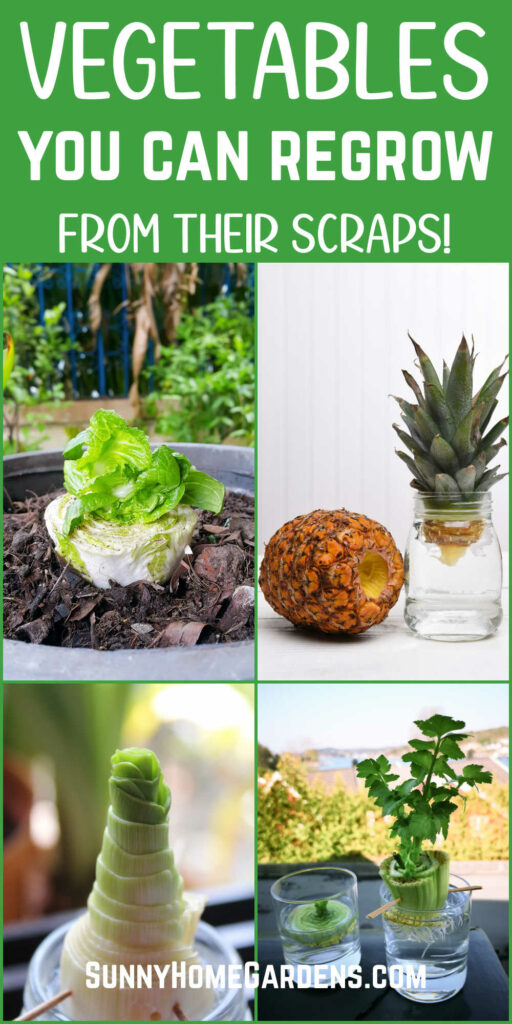
15 Vegetables You Can Regrow
Reusing food scraps from vegetables can help reduce waste and is an interesting way to grow your own produce. Below are examples of 15 vegetables you can regrow from kitchen scraps:
Green Onions
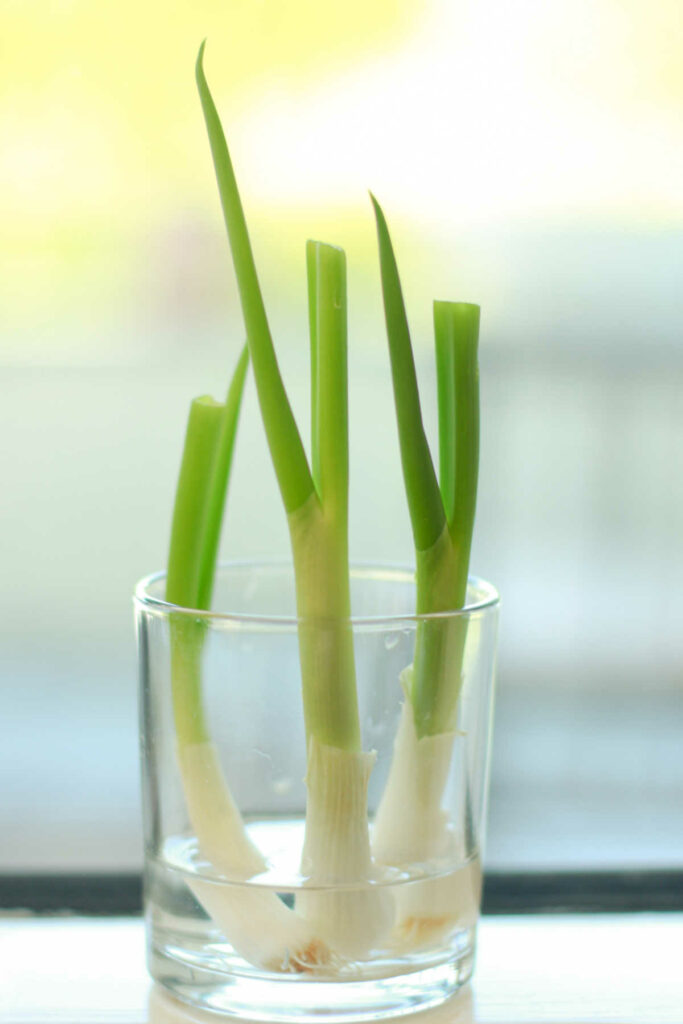
Regrowing green onions is a simple and rewarding process that allows you to enjoy a continuous supply of fresh greens.
Start by saving the root ends of the green onions with at least an inch of the white part attached.
Place the root ends in a glass or jar with enough water to submerge the roots, while keeping the tops above water.
Set the container in a sunny location, such as a windowsill, ensuring it receives plenty of natural light.
Change the water every couple of days to maintain freshness.
Within a week, you’ll notice new green shoots emerging from the tops of the onions.
When the green growth reaches a desirable length, typically 4-6 inches, you can harvest and enjoy them in your meals.
The process can be repeated multiple times, allowing you to regrow green onions from the same root ends.
Celery
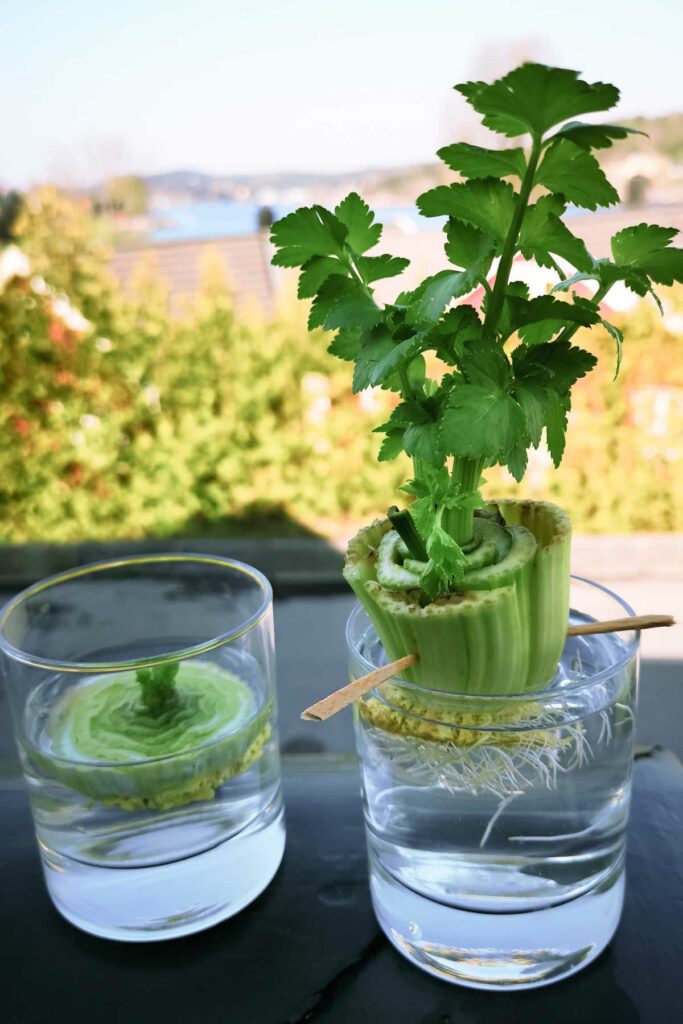
Regrowing celery from kitchen scraps is an easy and sustainable practice.
Begin by cutting off the bottom 2-3 inches of a celery stalk, preserving the root end with its intact base.
Place the celery base in a shallow dish or bowl filled with water, ensuring that only the bottom half is submerged.
Position the dish in a sunny, warm location, such as a windowsill, to encourage growth. Change the water every 1-2 days to maintain freshness and prevent the formation of bacteria.
Within a week, you will observe new leaves sprouting from the center of the celery base. Once the new growth reaches a height of about 3 inches, transplant the celery into a pot or garden bed filled with nutrient-rich, well-draining soil.
As the celery plant continues to grow, you can harvest individual stalks or the entire plant, depending on your needs.
Romaine Lettuce
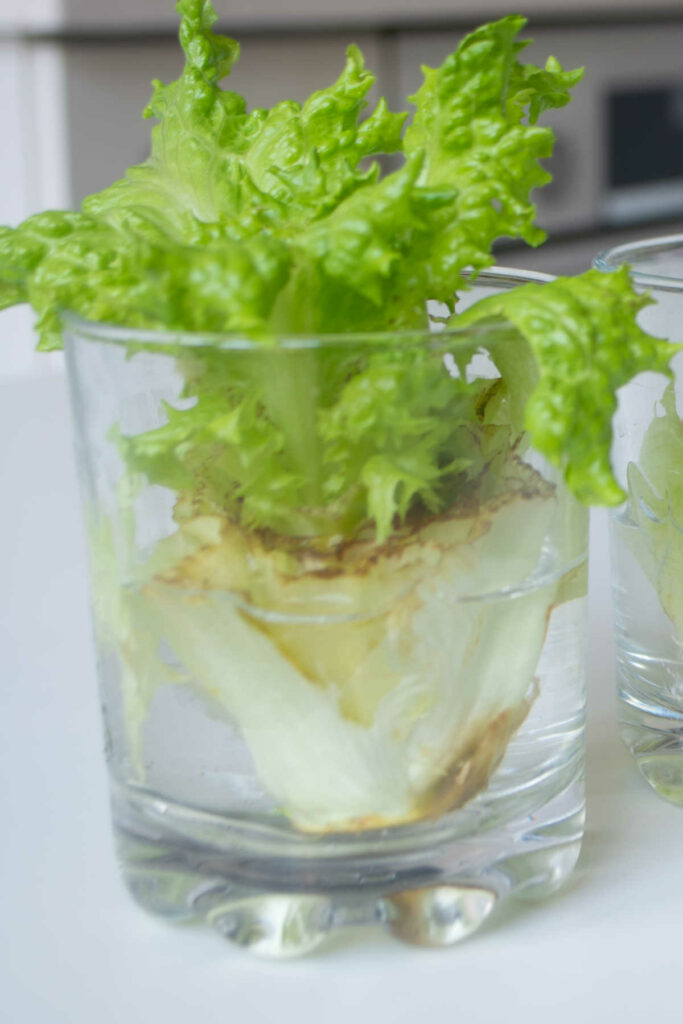
Regrowing lettuce is a simple and eco-friendly way to enjoy fresh greens from kitchen scraps.
This method works well with various types of lettuce, including romaine, butterhead, and leaf lettuces.
Begin by cutting off the bottom 1-2 inches of the lettuce head, preserving the root end.
Place the lettuce base in a shallow dish or bowl filled with water, ensuring only the bottom is submerged.
Set the container in a sunny spot, such as a windowsill, where it will receive ample light.
Replace the water every 1-2 days to keep it fresh and prevent bacterial growth.
Within a week, you’ll notice new leaves sprouting from the center of the base.
When the new growth reaches a height of 2-3 inches, transplant the lettuce into a pot or garden bed with well-draining, nutrient-rich soil.
As the plant matures, you can harvest individual leaves or the entire head, depending on your preference.
Garlic
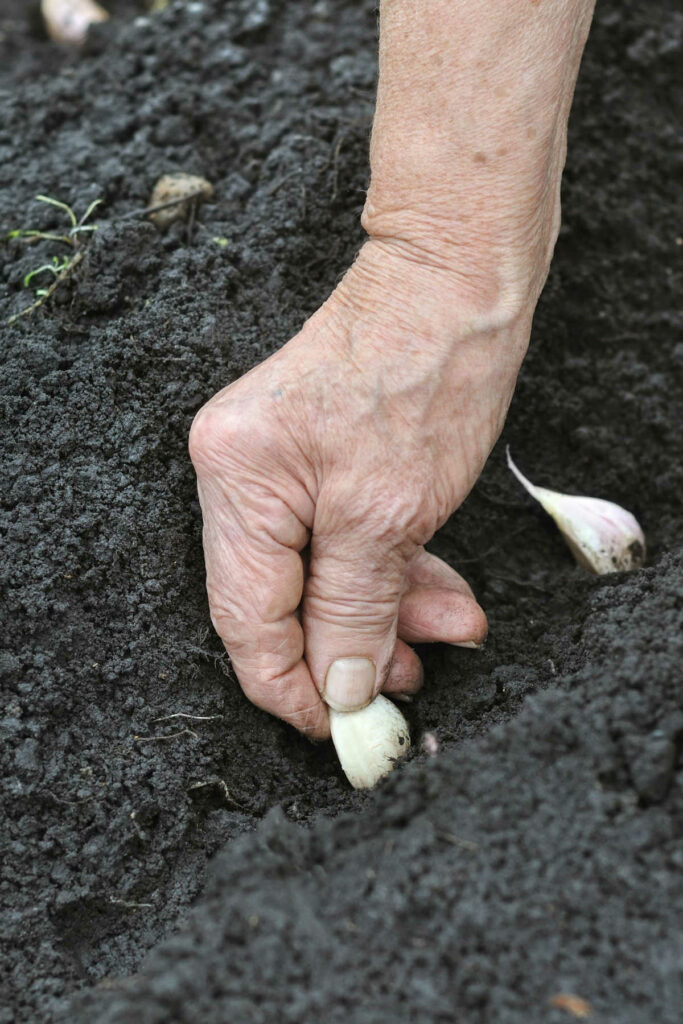
Regrowing garlic from cloves is a straightforward and cost-effective way to cultivate your own supply.
To begin, select a healthy, large garlic clove with its papery skin still intact.
Gently separate it from the bulb, taking care not to damage the base.
Plant the garlic clove in a pot or garden bed filled with well-draining, fertile soil, positioning it with the pointy end facing upward and the flat root end facing downward. Bury the clove about 2 inches deep, leaving the top slightly exposed.
Choose a sunny location, as garlic requires plenty of sunlight to thrive.
Water the soil regularly, keeping it consistently moist but not overly saturated. In a few weeks, you will see green shoots emerging from the soil.
As the plant matures, it will develop a new bulb beneath the soil, composed of multiple garlic cloves.
This process usually takes 6-8 months, after which you can harvest your homegrown garlic and enjoy its flavor in your favorite dishes.
Ginger
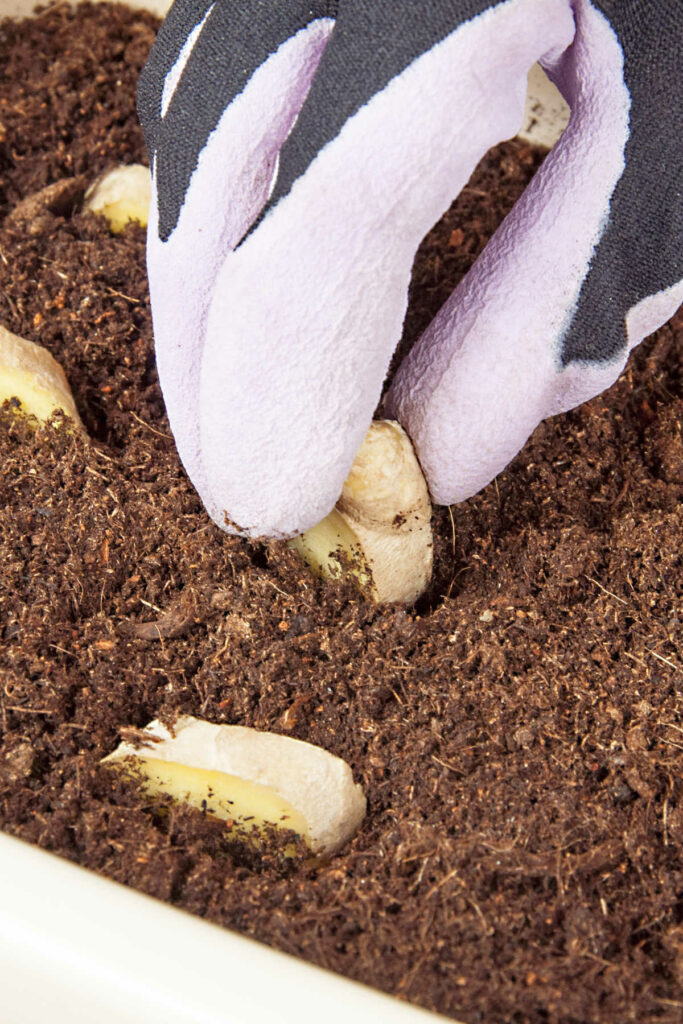
Growing ginger from a store-bought root is an easy and rewarding process, allowing you to cultivate your own supply of this versatile spice.
Start by selecting a healthy, plump ginger rhizome with several prominent “eyes” or buds.
Soak the rhizome in warm water for a few hours to remove any growth inhibitors.
Prepare a pot or garden bed with well-draining, fertile soil, and position the ginger rhizome just below the surface, with the eyes facing upward.
Choose a warm, partially shaded location, as ginger prefers indirect sunlight and temperatures between 70-80°F (21-27°C).
Water the soil regularly to keep it consistently moist but not waterlogged.
Within 2-3 weeks, you will see green shoots emerging from the soil, signaling successful ginger growth.
As the plant develops, you can harvest small sections of the rhizome as needed, allowing the remainder to continue growing.
With proper care, ginger can be regrown indefinitely, providing a constant supply of fresh, aromatic spice for your culinary creations.
Basil
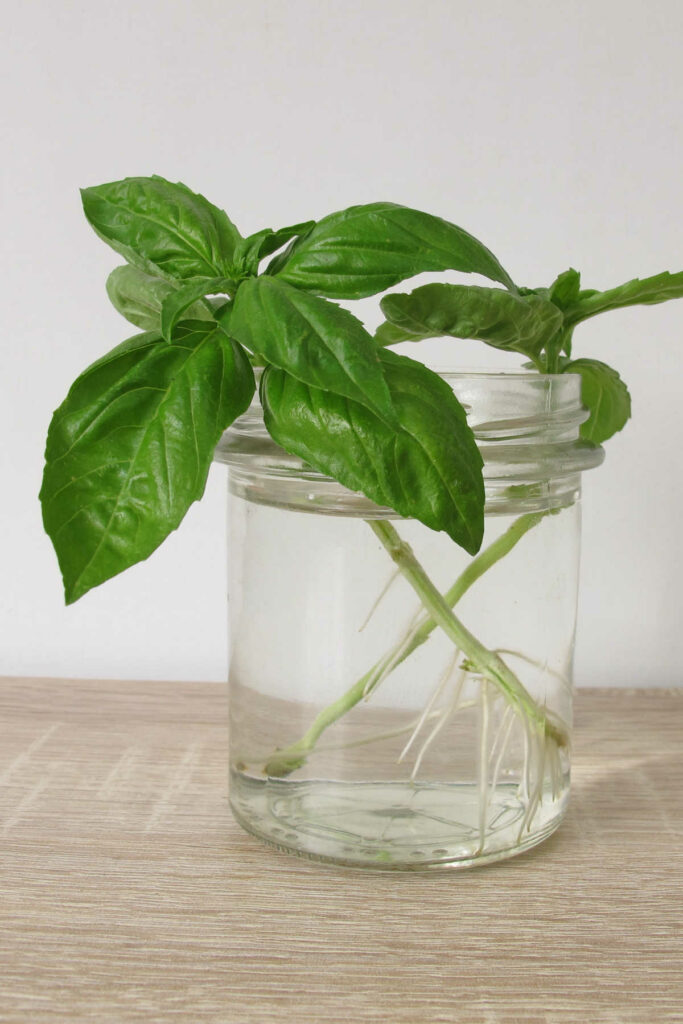
Regrowing basil, as well as other herbs such as mint, cilantro, and parsley, is a simple and resourceful way to enjoy a constant supply of fresh herbs.
To begin, select a healthy basil stem, approximately 4-6 inches long, with several leaves and at least one set of leaf nodes (the point where leaves join the stem).
Remove the lower leaves, leaving the topmost leaves intact.
Place the stem in a glass or jar filled with water, ensuring that the leaf nodes are submerged but the leaves remain above the waterline.
Set the container in a sunny spot, such as a windowsill, to provide ample light for growth.
Change the water every couple of days to maintain freshness.
Within 1-2 weeks, you should observe roots emerging from the leaf nodes.
When the roots have grown to about 2 inches in length, transplant the basil cutting into a pot or garden bed filled with well-draining, nutrient-rich soil.
As the plant matures, you can harvest individual leaves or entire stems, depending on your needs, while the plant continues to grow and flourish
Carrots
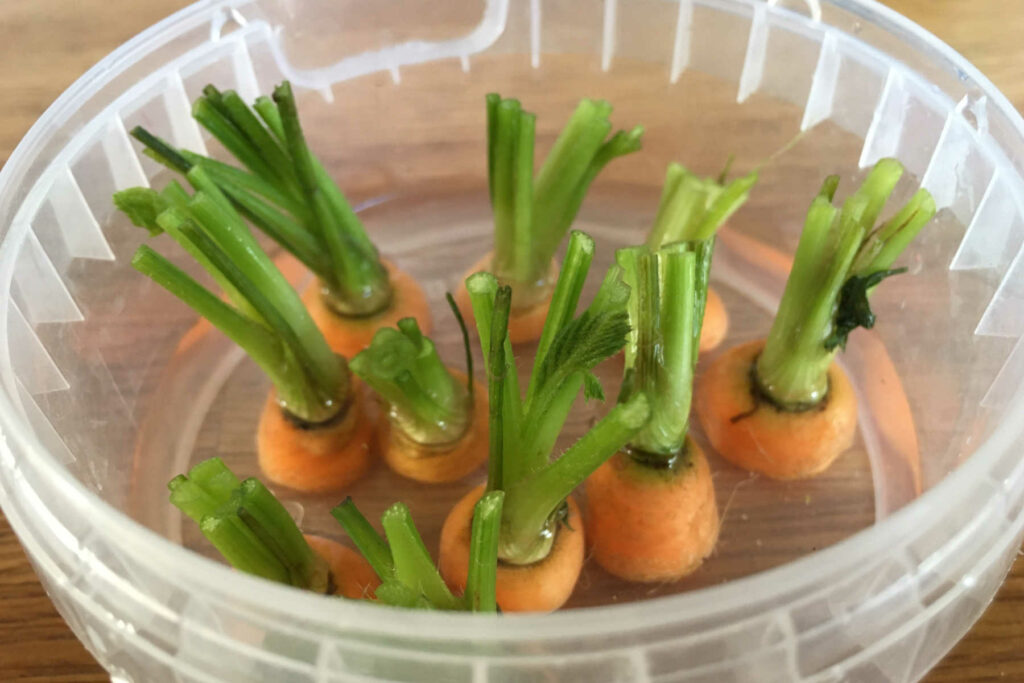
To regrow carrots, you will need to save the carrot tops, which contain the growth buds necessary for regeneration.
First, cut off the top 1-2 inches of a carrot, leaving a small portion of the orange root intact. Place the carrot top in a shallow dish filled with water, ensuring the water covers only the bottom half of the top.
Set the dish in a sunny spot, such as a windowsill, to promote growth.
Replace the water every 1-2 days to keep it fresh.
Within a week, you should see tiny green sprouts emerging from the top of the carrot. Once the sprouts have grown to around 2 inches, you can transplant the carrot top into a pot filled with well-draining soil.
The carrot will not regrow a full-sized root (aka carrot), but the green foliage can be harvested for use in salads, garnishes, or smoothies. Or you can let it flower and go to seed and plant the seeds.
Potatoes
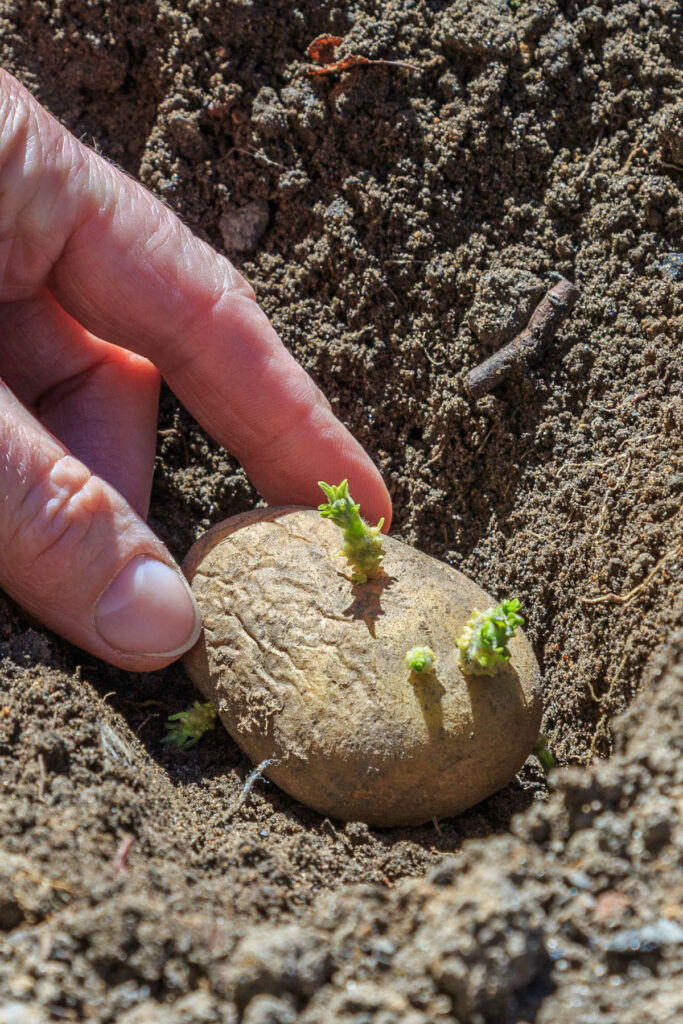
Growing potatoes from the peels are one of my favorite vegetables to regrow.
Begin by selecting a healthy, organic potato with several well-developed “eyes” or sprouts. Cut the potato into 1-2 inch chunks, ensuring that each piece has at least one eye.
Allow the cut pieces to air dry for a day or two, forming a protective skin to prevent rotting.
Prepare a pot or garden bed with well-draining, fertile soil, and plant the potato chunks approximately 4 inches deep, with the eyes facing upward.
Space the pieces about 12 inches apart to give them room to grow. Choose a sunny location, as potatoes require ample sunlight to thrive.
Water the soil regularly, keeping it consistently moist but not waterlogged.
As the potato plants grow, periodically mound soil around the base of the stems to encourage tuber development. In about 3-4 months, the foliage will begin to yellow and die back, signaling that the potatoes are ready to harvest.
Sometimes, I’ll also use a knife to peel potatoes, but I’ll peel it with a good 1/2″ or so of potato with the peel. I’ve planted this with mixed success.
Gently dig up the new potatoes and enjoy your homegrown crop in your favorite recipes.
Sweet Potatoes
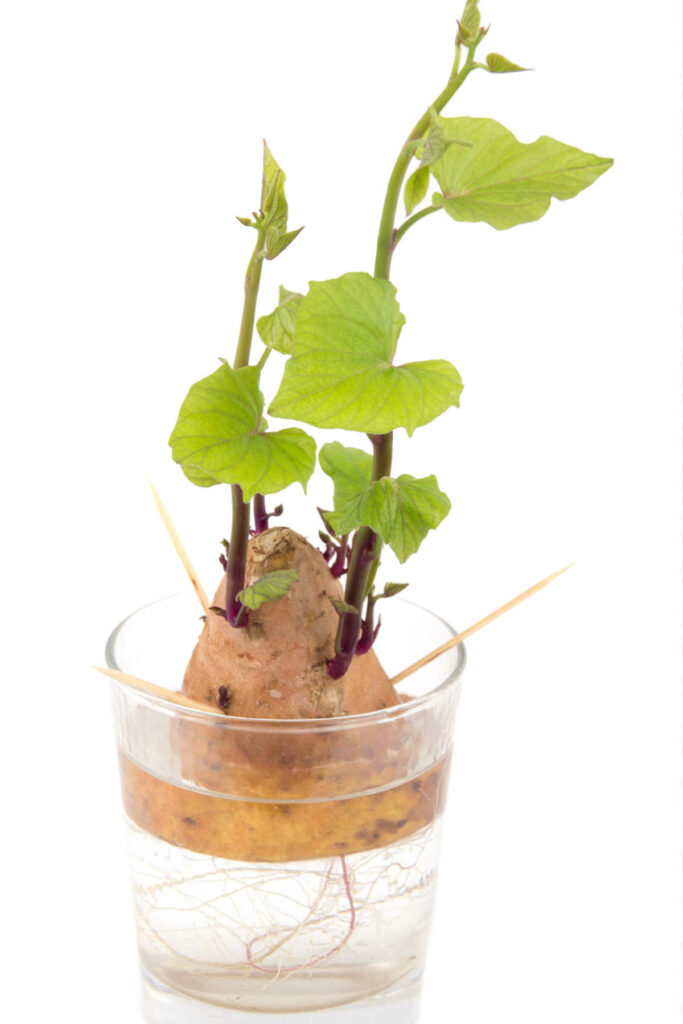
To start regrowing sweet potatoes select a healthy, organic sweet potato with several well-developed “eyes” or sprouts.
Cut the sweet potato in half and insert three to four toothpicks around the middle of each half, creating a support structure.
Fill a glass or jar with water and suspend the sweet potato half in the water, submerging the bottom half while keeping the top half exposed to air.
Set the container in a warm, sunny location, such as a windowsill.
Change the water every couple of days to maintain freshness.
Within 1-2 weeks, you should observe roots emerging from the submerged portion and shoots sprouting from the top.
Once the shoots reach 4-6 inches in length, gently twist or snip them off the sweet potato and place them in water to encourage root growth.
After the roots have developed, transplant the shoots into a pot or garden bed filled with well-draining, nutrient-rich soil.
As the plants mature, they will produce new sweet potatoes underground, typically ready to harvest in about 4-6 months.
Enjoy your homegrown sweet potatoes in a variety of delicious dishes.
Leeks

Cut off the bottom 1-2 inches of the leek, preserving the root end and a small portion of the white base.
Place the leek base in a shallow dish or bowl filled with water, ensuring that only the bottom is submerged.
Set the container in a sunny location, such as a windowsill, where it will receive ample light.
Replace the water every 1-2 days to keep it fresh and prevent bacterial growth.
Within a week, you’ll notice new green shoots emerging from the center of the leek base.
When the new growth reaches a height of 2-3 inches, transplant the leek into a pot or garden bed with well-draining, nutrient-rich soil.
As the leek plant continues to grow, you can harvest individual layers or the entire plant, depending on your needs.
Enjoy your homegrown leeks in a variety of savory dishes, such as soups, stews, and stir-fries.
Fennel
You can cut off the bottom 1-2 inches of the fennel bulb, preserving the root end and a small portion of the white base.
Place the fennel base in a shallow dish or bowl filled with water, ensuring that only the bottom is submerged.
Set the container in a sunny location, such as a windowsill, where it will receive ample light.
Replace the water every 1-2 days to keep it fresh and prevent bacterial growth.
Within a week, you’ll notice new green shoots emerging from the center of the fennel base.
When the new growth reaches a height of 2-3 inches, transplant the fennel into a pot or garden bed with well-draining, nutrient-rich soil.
As the fennel plant continues to grow, you can harvest individual layers or the entire plant, depending on your needs.
Enjoy your homegrown fennel in a variety of dishes, such as salads, soups, and roasts, for a burst of fresh, anise-like flavor.
Pineapple
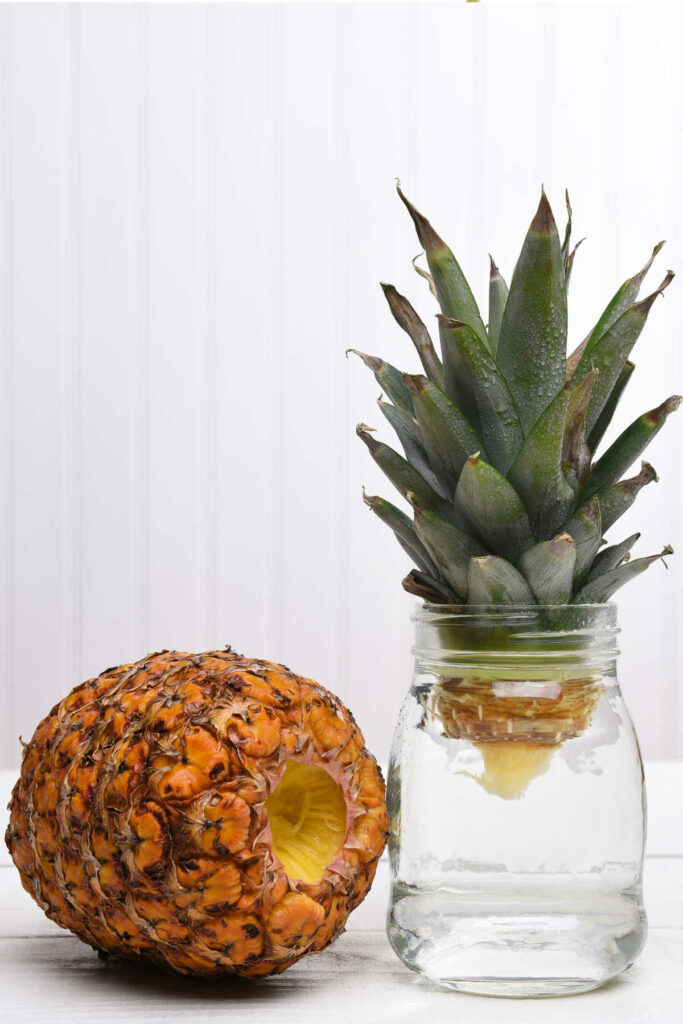
I think we’ve all heard you could regrow a pineapple from the top. And it’s true, you can.
To begin, remove the leafy crown from a store-bought pineapple by firmly twisting it or cutting it off, leaving about an inch of fruit attached.
Trim away the excess fruit and remove any small leaves from the base of the crown.
Allow the crown to air dry for a couple of days, which helps prevent rotting.
Fill a jar or glass with water and submerge the base of the pineapple crown, using toothpicks to support it above the waterline.
Place the container in a sunny location, such as a windowsill. Change the water every 2-3 days to maintain freshness.
Within 2-3 weeks, you should observe roots emerging from the base.
Once the roots have grown to about 3 inches in length, transplant the pineapple crown into a large pot or garden bed filled with well-draining, nutrient-rich soil.
Choose a sunny, warm location, as pineapples require ample sunlight and temperatures above 65°F (18°C) to thrive.
Pineapples grow slowly, and it may take 2-3 years for the plant to produce fruit.
However, with patience and proper care, you can enjoy homegrown pineapples, adding a touch of the tropics to your garden and your plate.
Beets
You can start regrowing beets by cutting off the top 1-2 inches of a beet, preserving the leafy stems and a small portion of the root.
Place the beet top in a shallow dish or bowl filled with water, ensuring that only the bottom half is submerged.
Set the container in a sunny location, such as a windowsill, to encourage growth. Replace the water every 1-2 days to keep it fresh and prevent bacterial growth.
Within a week, you should see tiny green sprouts emerging from the top of the beet. Once the sprouts have grown to around 2 inches, you can transplant the beet top into a pot filled with well-draining soil.
While the beet will not regrow a full-sized root, the green foliage can be harvested for use in salads, stir-fries, or as a nutritious side dish.
Cabbage
Cabbage can be regrown by cutting off the bottom 1-2 inches of a cabbage head, preserving the root end and a small portion of the leaves.
Place the cabbage base in a shallow dish or bowl filled with water, ensuring that only the bottom is submerged. Set the container in a sunny spot, such as a windowsill, where it will receive ample light.
Replace the water every 1-2 days to keep it fresh and prevent bacterial growth. Within a week, you’ll notice new leaves sprouting from the center of the base.
When the new growth reaches a height of 2-3 inches, transplant the cabbage into a pot or garden bed filled with well-draining, nutrient-rich soil. As the plant matures, you can harvest individual leaves or the entire head, depending on your preference.
Enjoy your homegrown cabbage in a variety of dishes, such as salads, stir-fries, and soups, for a fresh and nutritious addition to your meals.
Bok Choy
Regrowing bok choy is similar to regrowing lettuce.
Begin by cutting off the bottom 1-2 inches of a bok choy head, preserving the root end and a small portion of the white base.
Place the bok choy base in a shallow dish or bowl filled with water, ensuring that only the bottom is submerged.
Set the container in a sunny location, such as a windowsill, where it will receive ample light.
Replace the water every 1-2 days to keep it fresh and prevent bacterial growth.
Within a week, you’ll notice new leaves sprouting from the center of the bok choy base.
When the new growth reaches a height of 2-3 inches, transplant the bok choy into a pot or garden bed filled with well-draining, nutrient-rich soil.
As the plant matures, you can harvest individual leaves or the entire head, depending on your needs.
Enjoy your homegrown bok choy in a variety of dishes, such as stir-fries, soups, and salads, for a fresh and healthy addition to your meals.
Tips for Successful Regrowth
When attempting to regrow vegetables from scraps, it’s important to give them the best conditions for growth. Here are some helpful tips to ensure success with your regrowing efforts.
1. Choose the right scraps: Not all vegetables will regrow easily from scraps, so selecting the right ones is key. Examples of commonly regrown vegetables include potatoes, sweet potatoes, onions, garlic, and celery.
2. Start in water or soil: Depending on the vegetable, you might need to start the regrowth process in water or soil.
3. Provide proper conditions: Ensure your scraps receive the right light, moisture, and temperature levels for optimal growth. This means placing them in a spot with plenty of sunlight, maintaining consistent moisture levels in the soil, and ensuring the surrounding temperature is suitable for the specific vegetable.
4. Be patient: Regrowing vegetables from scraps can take time, so be patient and give the plant enough time to develop new roots, sprouts, and, eventually, harvestable growth. Keep in mind that some vegetables may regrow faster than others.
5. Harvest responsibly: It’s important to not overharvest the regrown vegetables to allow for continuous growth. For leafy greens, you should be able to harvest them for about a month.
With these tips in mind, you’ll be well on your way to successfully regrowing vegetables from scraps and enjoying a sustainable and rewarding gardening experience.
Conclusion
We’ve covered 15 different produce items that you can easily regrow from scraps.
By following the tips and methods provided, you can save money while enjoying fresh, homegrown produce.
Consider planting a combination of these vegetables in your kitchen or garden, allowing you to have an accessible and fresh supply of produce whenever you need it.
Lastly, don’t forget that there are even more vegetables, fruits, and herbs you can regrow from scraps. Expand your gardening horizons, and continue exploring the world of regenerative gardening.
Happy growing!